Abbotsford Drywall and Steel Stud Framing
What is Drywall Taping and Mudding

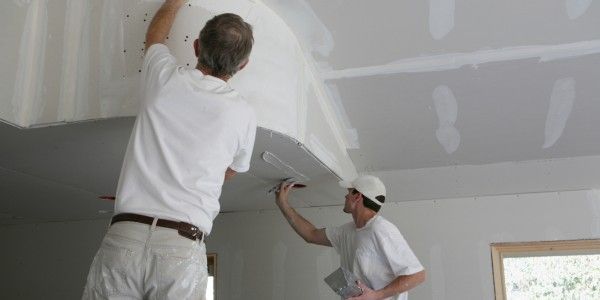
Regarding the construction and finishing of interior walls and ceilings, two fundamental processes are important in achieving a smooth, seamless surface: drywall taping and mudding. These essential techniques are the unsung heroes of interior construction, transforming raw drywall panels into polished, ready-to-paint surfaces.
Let's explore these two more below:
Common Uses of Drywall Taping and Mudding
Seam Concealment
Drywall sheets are installed in large panels, leaving gaps and seams between them. Taping and mudding conceal these seams, creating a seamless appearance on walls and ceilings.
Surface Smoothing
Drywall sheets can have imperfections or unevenness. Taping and mudding are necessary for smoothing these irregularities. They ensure a flat and even surface for painting or wallpapering.
Strength and Durability
Taping reinforces the joints between drywall panels. Mudding further adds strength and durability to the surface.
How Drywall Taping Works?
Drywall taping applies paper or fibreglass tape to the seams and joints between drywall panels. This step is important for preventing cracks and creating a seamless appearance.
This is the breakdown of the process:
Prepare the Surface
- Ensure the drywall surface is clean and free of dust or debris.
Apply Joint Compound
- Use a taping knife to spread a thin layer of joint compound (commonly referred to as "mud") along the seam or joint.
Embed Tape
- Immediately press the tape into the wet joint compound, ensuring it fully covers the seam. Use a taping knife to smooth out any wrinkles or bubbles.
Cover with More Mud
- Apply a second, slightly wider layer of joint compound over the tape, feathering the edges to blend it with the surrounding wall.
Let it Dry
- Depending on humidity and thickness, this can take 24 hours or more.
Sand and Repeat
- Lightly sand the area to smooth out imperfections once dry. Repeat the process. Add more layers of mud and sanding until the seam is invisible and the surface is smooth.
Inspect and Finish
- Carefully inspect the taping job for any remaining imperfections. Once satisfied, the surface is ready for mudding or finishing as needed.
Drywall Mudding and Types of Joint Compounds
Drywall mudding, often called "mud work," applies joint compounds to the seams and joints to create a smooth, uniform surface. Joint compounds come in various types, each suited for specific purposes. Here are the most common types:
| Type of Joint Compound | Description |
|---|---|
| All-Purpose Joint Compound | Versatile and suitable for most taping and mudding jobs. It's ideal for embedding tape, filling seams, and covering screw or nail heads. |
| Lightweight Joint Compound | Contains additives that reduce its weight, making it easier to work with and reducing the chance of sagging. It's excellent for the final coats. |
| Setting-Type Joint Compound | Known also as "hot mud," it sets quickly and is perfect for initial coats or repairs. It comes in different settings, such as 20, 45, or 90 minutes. |
| Topping Compound | Designed for the final finishing coats. It provides an ultra-smooth surface, perfect for painting or wallpapering. |
Now, let's delve into the step-by-step process of drywall mudding:
How Drywall Mudding Works?
Mudding applies joint compounds to seams, joints, and screw/nail indentations to create a smooth and seamless surface for easy drywall repair.
This is how to do it:
Prepare the Surface
- Ensure the taped seams and joints are clean and dust-free.
Apply First Coat
- Using a taping knife or a wider drywall knife (12 inches or more), apply a thin coat over the taped seams. This is to feather the edges to blend with the surrounding wall.
Embed Paper Tape
- For inside corners, embed paper tape into the first coat of mud, ensuring it's fully covered.
Let it Dry
- This process can take 24 hours or more.
Apply Second Coat
- Apply a wider coat of joint compound, extending it beyond the first coat. Feather the edges to create a gradual transition.
Sand and Repeat
- Once the second coat is dry, lightly sand the surface to remove imperfections. Apply additional coats as needed.
Finish and Sand
- For the final coat, use a topping compound for an ultra-smooth finish. Sand the surface one last time to achieve a flawless result.
Inspect and Finish
- Carefully inspect the mudding job for any remaining imperfections. Once satisfied, the surface is ready for priming and painting.
Tools and Materials for Taping and Mudding
You'll need the right tools and materials to achieve professional drywall taping and mudding results. The following is a list of essential items:
Tools for Taping
- Taping knife (4 to 6 inches)
- Utility knife or drywall saw
- Drywall tape (paper or fiberglass)
- Joint compound (all-purpose)
- Sandpaper (medium-grit)
- Mud pan or hawk
- Taping gun or dispenser (for automatic taping)
- Sanding block or pole sander
- Safety glasses and a dust mask
Tools for Mudding
- Wider drywall knives (8 to 12 inches)
- Corner trowel (for inside corners)
- Mud pan or hawk
- Joint compound (various types)
- Sandpaper (medium to fine-grit)
- Sanding block or pole sander
- Safety glasses and a dust mask
Additional Materials
- Drop cloths or plastic sheeting
- Joint compound mixer or paddle attachment for a drill (for mixing large quantities)
- Bucket for mixing joint compound (if not using pre-mixed)
- Joint compound corner bead (for outside corners)
- Primer and paint (for finishing)
Practical Tips and Techniques for Professional Results
To ensure your drywall taping and mudding efforts yield professional-grade results, below are some practical tips and techniques:
- Choose the appropriate type of joint compound for each stage of taping and mudding.
- Apply joint compound in thin, even coats. Multiple thin coats are more effective than a single thick one.
- Feather each coat's edges to transition from the taped area to the surrounding wall gradually. This prevents noticeable humps or ridges.
- Always sand the surface between coats to remove imperfections and create a smooth finish. Use a sanding block or pole sander for large areas.
- Adequate lighting is important for spotting imperfections. Use a work light or portable task lighting to inspect your work.
- Drywall taping and mudding require practice. Don't be discouraged if your first attempts aren't perfect. With time and patience, you'll improve your skills.
Find Reliable Drywall Vancouver Services
Drywall taping and mudding are essential for achieving flawless interior walls and ceilings. When executed correctly, these techniques result in surfaces ready for priming and painting.
If you are looking for "drywall services near me" for your drywall taping, mudding, or any other interior finishing needs, our local professionals are here to deliver craftsmanship. You can trust Abbotsford Drywall & Steel Stud Framing to transform your spaces into works of art.
Don't hesitate to reach out to us today.
